
xwMOOC 컴퓨터
부랑자(Vagrant) 아나콘다
학습 목표
- 부랑자(Vagrant)를 활용해서 아나콘다를 설치한다.
1. 부랑자(Vagrant)기반 과학컴퓨팅(아나콘다) 설치 개요
사용자 컴퓨터 운영체제 독립적으로 가상상자(VirtualBox)와 부랑자(Vagrant)를 설치한 후에 Vagrantfile에 설정된 내용에 맞춰 과학컴퓨팅(아나콘다) 기본환경을 설정한다.
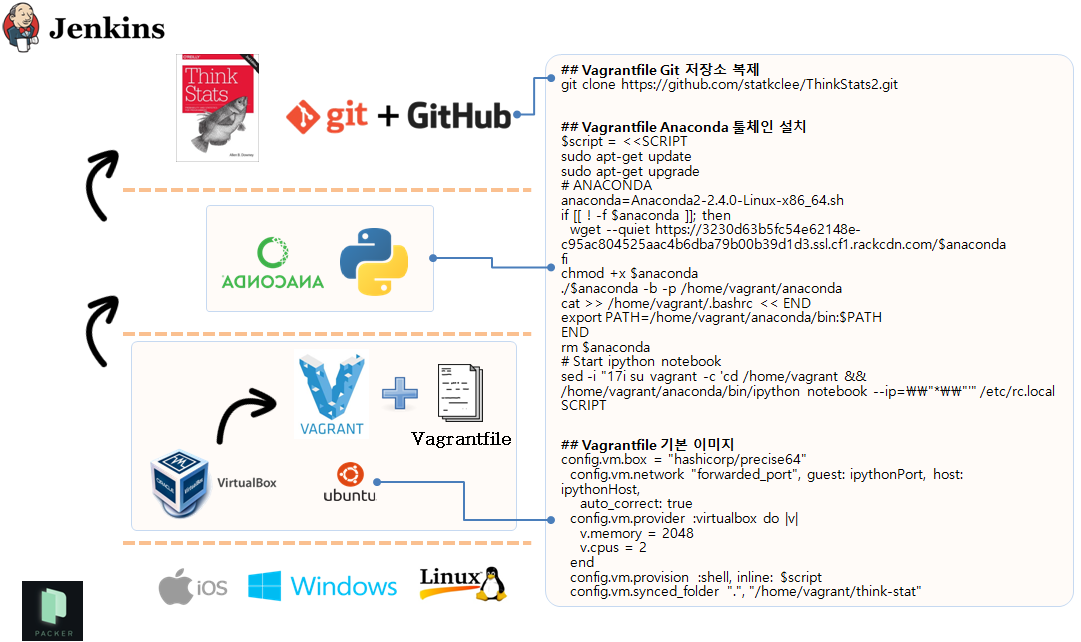
2. 부랑자(Vagrant) 환경 설정
기본적으로 부랑자(Vagrant)는 가상상자(VirtualBox)를 가정하고 시작된다. 따라서 가상상자와 함께 부랑자를 함께 먼저 본인이 사용할 컴퓨터 운영체제에 맞춰 설치한다.
$ vagrant init
$ ls
Vagrantfile
$ vagrant up --provision
$ vagrant ssh
vagrant init명령어는 boilerplate 혹은 skeleton 으로 불리는Vagrantfile을 생성한다.nano Vagrantfile파일에 한글 LaTeX 설치 쉘스크립트를 복사하여 붙여넣는다.vagrant up --provision명령어를 실행하면 기본 운영체제최신 우분투 64비트와 함께Anaconda엔진을 함께 설치한다.vagrant ssh명령어를 통해서 한글 IPython Notebook이 설치된 가상컴퓨터에 접속한다.git clone https://github.com/statkclee/ThinkStats2.git명령어를 입력하면 작업 프로젝트 파일을 가상컴퓨터 내부로 가져온다.cd ThinkStats2\code명령어를 실행하면.ipynb파일과.py코드를 함께 예제로 살펴볼 수 있다.
2.1. IPython 노트북 Vagrantfile 환경설정 파일
# -*- mode: ruby -*-
# vi: set ft=ruby :

$install_python = <<SCRIPT
# ANACONDA
anaconda=Anaconda2-2.4.1-Linux-x86_64.sh
if [[ ! -f $anaconda ]]; then
  wget --quiet https://3230d63b5fc54e62148e-c95ac804525aac4b6dba79b00b39d1d3.ssl.cf1.rackcdn.com/$anaconda
fi
chmod +x $anaconda
./$anaconda -b -p /home/vagrant/anaconda
cat >> /home/vagrant/.bashrc << END
export PATH=/home/vagrant/anaconda/bin:$PATH
END
rm $anaconda
# Start ipython notebook
sed -i "17i su vagrant -c 'cd /home/vagrant && /home/vagrant/anaconda/bin/ipython notebook --no-browser --ip=0.0.0.0'" /etc/rc.local
SCRIPT

Vagrant.configure(2) do |config|
  config.vm.box = "ubuntu/trusty64"

  config.vm.network "forwarded_port", guest: 8000, host: 8000, auto_correct: true

  config.vm.provider :virtualbox do |v|
    v.memory = 2048
    v.cpus = 2
  end

  config.vm.provision :shell, inline: $install_python
  config.vm.synced_folder ".", "/home/vagrant/"
end
3. 가상컴퓨터에 IPython 노트북 실행
vagrant up 명령어를 통해서 가상 컴퓨터에 IPython 노트북을 올리고 vagrant ssh로 접속한 후에 ipython notebook --ip=0.0.0.0 --no-browser 명령어를 통해서 IPython 노트북을 웹서버 형태로 서비스를 올린다. --ip=0.0.0.0 --no-browser 옵션사항 설정에 대해서는 xwMOOC 공개수업에서 확인바란다.
그리고 난후에 마지막으로 웹브라우져를 열고 http://localhost:8888을 입력하면 모든 것의 설정이 완료되었다.
admin@xwMOOC ~/scientific-computing $ vagrant up
admin@xwMOOC ~/scientific-computing $ vagrant ssh

   Welcome to Ubuntu 14.04.3 LTS....

vagrant@vagrant-ubuntu-trusty-32:~$ ipython notebook --ip=0.0.0.0 --no-browser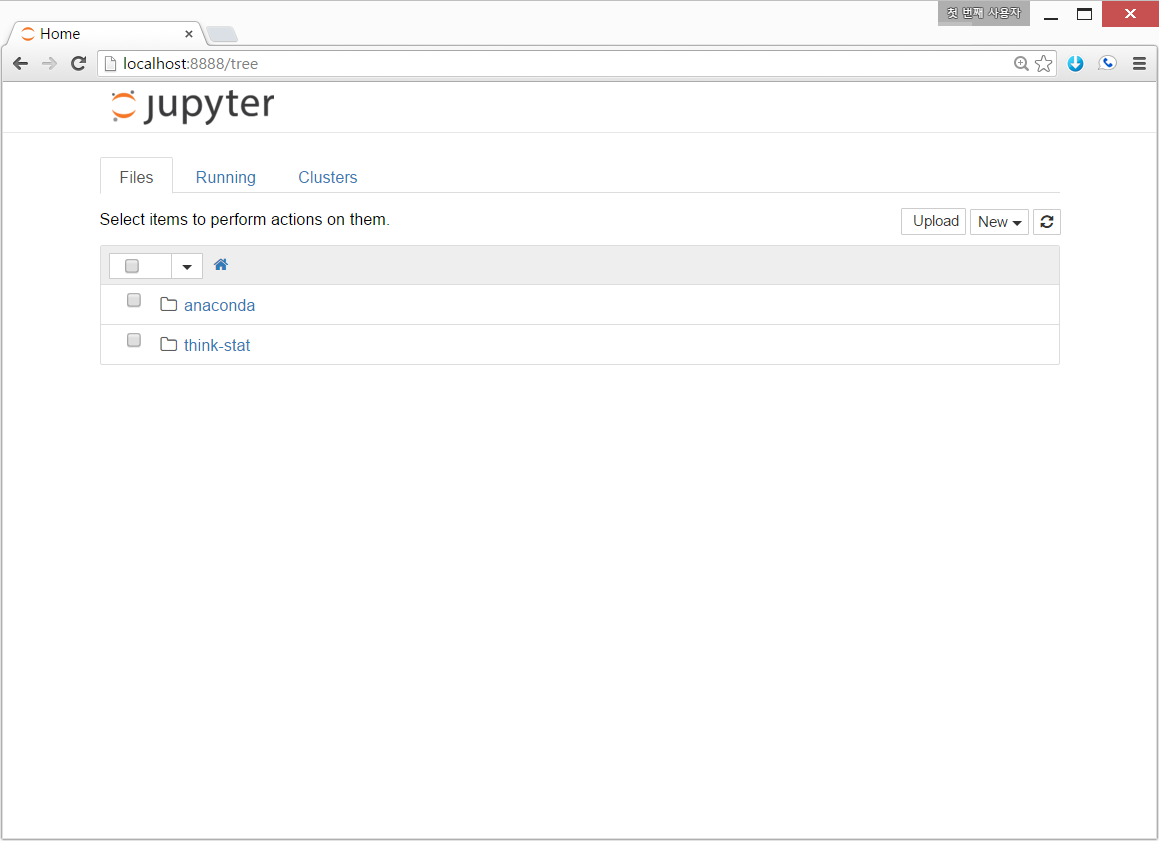
4. 부랑자 가상컴퓨터 끄기
부랑자 가상컴퓨터 사용을 마쳤으면, 이제 모든 것을 꺼서 다른 작업에 컴퓨터의 자원을 환원할 필요가 있다. 다양한 방법이 존재한다. 자세한 내용은 구글링을 하거나 인터넷 질의응답 사이트를 참조한다.
$ vagrant global-status | awk '/running/{print $1}' | xargs -r -d '\n' -n 1 -- vagrant suspend참조-Data Science Toolbox: Start doing data science in minutes